If your Nest Thermostat was recently installed, it’s normal for it to take longer to learn your AC system’s abilities. So, you may find that it takes several hours for your home to cool down. Still, if your Nest doesn’t seem to be working properly it could be a sign of other problems.
If your Nest isn’t cooling your home as expected, you’ll want to do some troubleshooting to find the cause as quickly as possible. Then, you may need to do some minor rewiring or adjust the settings to get it up and running.
Your Nest Thermostat may not be cooling if it’s wired incorrectly, especially if you mixed up the heat pump and conventional wiring configurations. A tripped breaker, blown fuse, or problem in the settings can also cause Nest to malfunction. Sometimes, the fix is as simple as an update or reset, all of which you should be able to do yourself.
Let’s review each of these potential problems in more detail, and we’ll walk you through how to check and correct them to get your Nest working properly.
First, Check If Your System Can Handle Nest
Nest Thermostats are designed to work with most systems, even if the system is pretty old. As long as you have a 24V system, chances are that Nest is compatible. Still, there are a few things you can check to find out if Nest won’t work with your system right away.
Start by removing the cover from your current (or old) thermostat and see what you can find.

Nest isn’t compatible with these kinds of systems:
- Thermostat has stranded wires
- Thermostat has thick, stranded wires connected with wire nuts
- Thermostat is labeled 110V or 120V (high voltage wires)
- System uses Y3 wires
- Wires are labeled “1 2 3 4” or “A B C D”
- V or VR wires are used
- Water or H2O wires are used
Another great tool is Google Nest’s online Compatibility Checker. To use this tool, you’ll need to know what type of system you have.
Most thermostats have two labels for the wires: one marked “CONVENTIONAL” and one marked “HEAT PUMP.” You’ll need to determine whether you have a conventional or heat pump system to proceed with the setup process.
The best way to know for sure is to check your system’s manual, but you can also look at the wire colors as a guide.
- If the O/B-W wire is orange, you likely have a heat pump.
- If the O/B-W wire is white, you likely have a conventional system.

Check For Mislabeled & Incorrect Wiring
Note: Before you begin touching any wires, be sure to cut the power to your thermostat and HVAC system at the circuit breaker.

Mislabeled Thermostat Wires & Relabeling
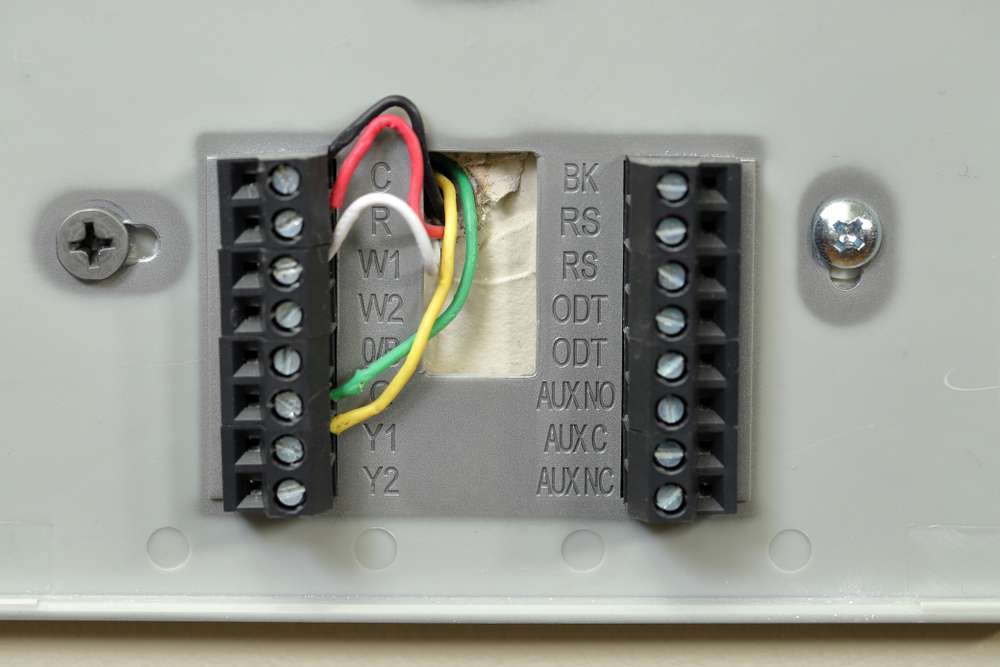
It’s always a good idea to take a picture of your thermostat’s current wiring setup before you start disconnecting anything or making changes. Referencing the existing setup and labeling the wires before you remove them is critical to an easy and successful installation.
In some cases, your wires may be mislabeled, which could cause you to connect them to the wrong place on your new thermostat. It can be even more confusing when your thermostat has two sets of labels.
Remember, the letters on your thermostat don’t necessarily match up with the wire colors. When you install your new thermostat, refer to the picture of your original thermostat’s setup and put the wires into the same letter they were in before.
For example, “R” doesn’t necessarily correspond with a red wire, and “Y” doesn’t necessarily mean a yellow wire should go there.
Use the stickers provided with your Nest Thermostat to relabel your wires based on which connection they were attached to on your old thermostat. Then, when you install your new Nest Thermostat, you’ll know exactly where to insert the wires.
Disconnect Common Wire
During the setup process, the Nest app will tell you if you need to connect the common wire (or C-wire) to power the system.
Depending on your system, you may be required to use a common wire or a power accessory like the Nest Power Connector. This may apply to you if you have a heating or cooling-only system, zone-controlled system, or heat pump system.
If you find that your system is only blowing warm air, you may need to disconnect the common wire to resolve the issue. You can try removing the C-wire to see if your system will blow cool air like it’s supposed to.

Check Y1 Terminal Connections
Y or Y1 wires are what normally control the cooling system. If you have a heat pump system, the Y or Y1 wire controls your system’s compressor. You need a good connection in the Y1 connector to turn your cooling system on as needed.
If you see an error code on your Nest Thermostat indicating a problem with the Y1 wire (you may see “E103” on your screen), it could mean there is too much voltage in the wire. In that case, you could be dealing with a problem with your HVAC system itself.
RC, RH Wiring Issue
The RC connector is only used on conventional systems, and it’s not used on heat pump systems. So, if you have a heat pump system and there is a wire going into the RC connector, you know that you need to refer back to your old thermostat’s wiring setup and adjust it as needed.
If your old system had a jumper wire connected to the R, RH, or RC connectors, you should remove it. Nest Thermostats do not use jumper wires as Nest will automatically jump the connectors if needed.
Rewire Nest Thermostat
One of the common problems for new Nest Thermostats is that they’ve been wired incorrectly. If your system is blowing hot air instead of cold, it could mean that you mixed up the wiring for a conventional versus heat pump system.
Conventional systems have separate equipment for heating (furnace) and cooling, and they use natural gas to run the system. Heat pump systems are essentially air conditioning systems that also work in reverse during the winter to heat the home.
An easy way to know if you have a heat pump is to turn on the heat inside your home and see if the condenser outside comes on. If it does, you likely have a heat pump.
Once you know for sure which type you have, verify the wiring instructions based on your system type and move the wires as needed. This may resolve your issue if the Nest Thermostat was wired incorrectly.
C-Wire System
In most cases, wires with a “B” label are supposed to fit into the O/B connector. However, some systems have a common wire fitted into the B connector. For Nest Thermostats, the common wire (or C-wire) should always go into the C-connector.
The common wire is used to power the thermostat without using battery power. Inserting a C-wire into the wrong connector can blow a fuse or damage your Nest Thermostat.
If you see an “E1” error code on your Nest display, it means you need a common wire (C-wire) connected.
Note: Most thermostats designate “C” as the common wire. However, some models from Trane, American Standard, and York may use “B” to designate the common wire connector.
Check the Circuit Breaker Box For Tripped Breaker
If the problem with your Nest Thermostat is not related to the wiring, it could mean you have a tripped breaker. If you find your thermostat has no power or your HVAC system is off completely, check your circuit breaker box to see if one of the breakers is tripped.
Thermostat breakers may trip if there is an overloaded circuit, something is short circuited, or there’s a ground fault.
Start by resetting the breaker and see if this fixes the problem. Start by standing to the side of the breaker box so your body isn’t in front of the panel. This is just a precautionary safety measure in case any voltage comes from the box.
Then, turn the breaker to the “off” position and back to the “on” position.
If the breaker keeps tripping, you may need to call an electrician to come look at it to find the source of the problem.

Blown Fuse Inside Air Handler
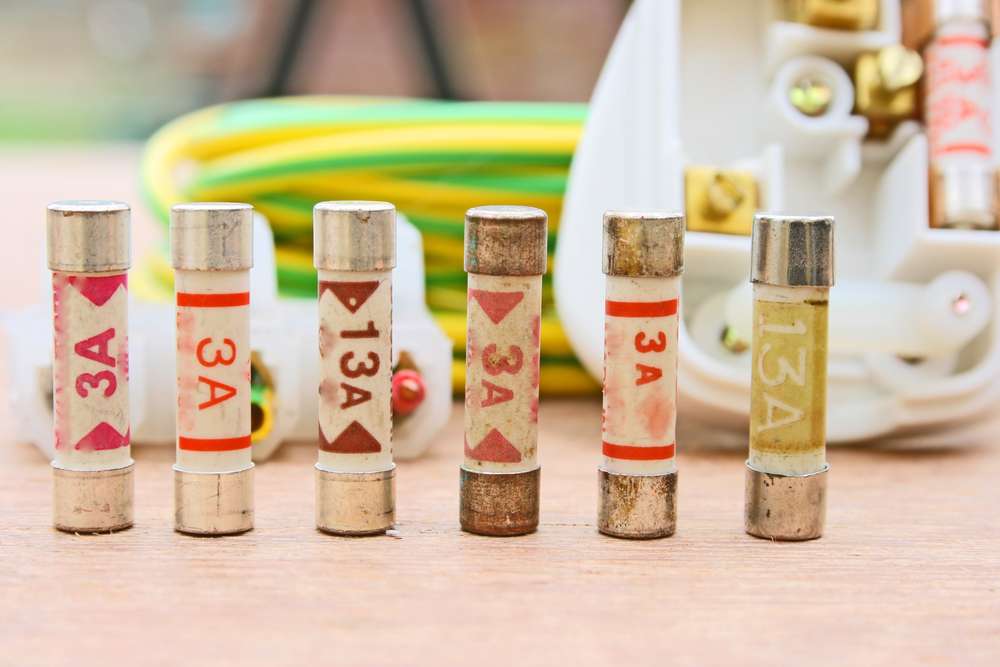
If your Nest Thermostat and HVAC system aren’t working properly, another cause could be a blown fuse inside the air handler.
If you’re dealing with a blown fuse, you’ll notice that the AC system isn’t making any sounds or pulling in air from the outside. If you have a voltmeter and know how to use it safely, you can check your system’s voltage.
A voltage reading on the “line” side but not on the “load” side means you’re dealing with a blown fuse.
The fuse isn’t always easily accessible, so you may want to call an AC specialist to check for this issue. Plus, it can be dangerous to poke around inside your HVAC system’s electrical components if you’re not properly trained to do so.

Mistakes in Temperature Schedule
Nest Thermostats can help save energy (and money) by switching to Eco Temperatures when no one is home, and then switching back to their normal temperatures when you are at home.
Some Nest Thermostat models have learning capabilities to auto-schedule your temperature preferences based on your habits.
While these options can be very convenient, they can also cause trouble when they’re not working properly.
Start by checking your settings in the Nest app. For example, the auto-schedule setting will allow Nest to set the temperature for you based on the data it collects about your comings and goings.
Another setting is the Home/Away feature, which allows Nest to detect whether you’re home or not. Nest will use that information to adjust your temperature settings. Eco Mode does the same sort of thing, adjusting the system to save energy when no one is home.
So, if you find that Nest’s schedule isn’t working for you, simply turn those settings to “off” inside the Nest app. Or, you can manually set a schedule that you want Nest to use by adjusting it within the app.
You can also turn off the auto-schedule feature at the thermostat by following these steps: Settings → Nest Sense → Auto-Schedule → Off
Delete or reset the schedule at the thermostat by following these steps:
Settings → Reset → Schedule → Clear or Reset

Thermostat Placed in a Warmer Spot
Variations between your thermostat’s temperature and the ambient temperature in your home can be caused by a few different issues. However, one of the most common causes for slight temperature differences is your thermostat’s location.
For example, if your Nest Thermostat is located on an uninsulated wall or in an area that’s normally much warmer or cooler than the rest of the home, it could cause temperature variations.
Since your Nest Thermostat has a temperature sensor inside, the temperature at the thermostat’s location will be the information the unit uses to adjust your temperature settings.
A potential solution is to use a Nest Temperature Sensor in the room that you spend the most time in so your Nest Thermostat knows the temperature in that location and uses it to change your AC and heat settings.
Update Nest Software
Your Nest Thermostat should automatically update as new software becomes available. Since the thermostat is connected to your home’s wi-fi, it’s able to keep itself up to date without any added effort on your part.
However, you can manually update your system from the Nest app to make sure you have the most up-to-date version of the software.

Follow these steps to update your Nest Thermostat:
- Open the Nest app
- Tap “settings”
- Tap “thermostats”
- Tap on your thermostat (or the one you want to update)
- Tap “settings” (the gear icon)
- Tap “software updates”
- If it says “Update available,” tap “update”
Restart the System
If your Nest Thermostat seems like it’s not working properly, is running slower than normal, or you have a frozen display, you may need to restart the system. Or, if you’re having trouble getting Nest connected to your wi-fi, a reboot may be in order.
Follow these steps to restart the system:
- Press the Nest Thermostat to open the menu
- Select “settings” (the gear icon)
- Select “Reset”
- Select “Restart”
If your Nest Thermostat is frozen or unresponsive, you can manually restart the system by following these steps:
- Push the Nest Thermostat ring down and hold it for about 10 seconds, or until the screen turns off, then release
- Press and release the ring one time to turn it back on
- Wait for the restart process to complete

If All Else Fails, Reinstall Your Old Thermostat
If none of the troubleshooting steps resolves the issue with your Nest Thermostat, you may want to reinstall the old one to narrow down the problem.
If you put the old thermostat back on and everything works normally, you’ll know there’s a problem with the Nest Thermostat. Otherwise, you’ll know the HVAC system is malfunctioning.
To reinstall your old thermostat, turn off the circuit breaker and remove the Nest thermostat. Refer to the photo you took of the wiring to put the wires back into their original connectors.
When you power the system back on, you’ll be able to tell if the issue is with the thermostat or something else. If it’s still not working correctly, it would be a good idea to call a professional to come take a look.
Similar Problems
Nest Thermostat Keeps Delaying Cooling
The “delayed” message normally indicates a low power issue. You can correct this by using a common wire (C-wire) connection or a power source. As a temporary measure, you can charge the Nest Thermostat using the charging port inside the cover.
Nest Thermostat Says Cooling But No Air
This is likely a wiring issue, so you should double check that the Nest Thermostat is wired correctly for your system type.
Nest Thermostat Won’t Stop Cooling
This is normally due to a wiring issue, or the fan is set to “always on.” Check that all the thermostat wires are inserted fully and are inserted into the appropriate connectors.
Nest Thermostat Not Showing Cool Mode
If you’re not getting “cool” mode on your thermostat, verify the wiring is correctly inserted into the Y1 terminal. This is the connector responsible for your cooling system, so you’ll need to verify the wiring is correct.
Nest Thermostat Not Cooling After Power Outage
After a power outage, your Nest Thermostat may be offline. Start by restarting the thermostat or turning it off and back on. This will allow it to reconnect to your wi-fi and reset the system. You may also need to check your breakers to ensure nothing was tripped.


